Wiper Blades

Wiper Blades
If the wiper blades become brittle or damaged, or make streaks when wiping, replace the wiper blades.
To install new wiper blades, follow the procedures below.
CAUTION:
To avoid scratching or breaking the
window, do not let the wiper arm
strike the window while replacing the
wiper blade.
NOTE:
Some wiper blades may be different from
the ones described here depending on
vehicle specifications. If so, consult your
SUZUKI dealer for proper replacement
method.
For windshield wipers:

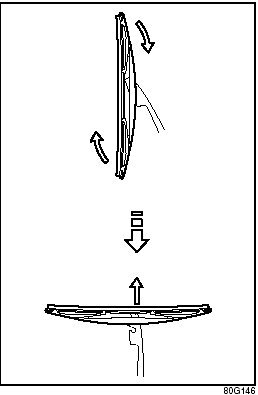
1) Hold the wiper arm away from the window.
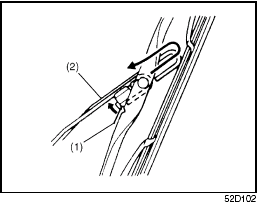
2) Squeeze lock lever (1) towards wiper arm (2) and remove the wiper frame from the arm as shown.
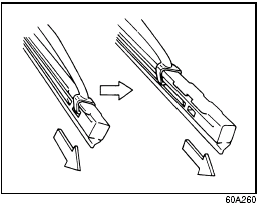
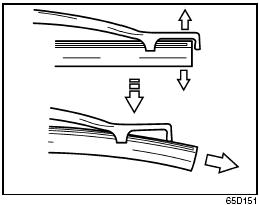
3) Pull the locked end of the wiper blade firmly to unlock the blade and slide the blade out as shown.
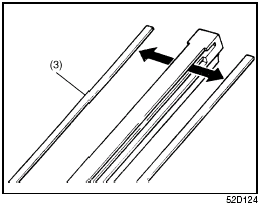
(3) Retainer
4) If the new blade is provided without the two metal retainers, move them from the old blade to the new one.
Installation
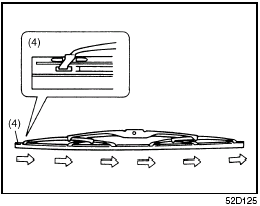
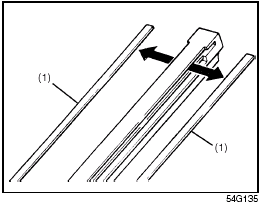
(4) Locked end
5) Install the new blade in the reverse order of removal, with the locked end positioned toward the wiper arm. Make sure the blade is properly retained by all the hooks. Grasp the blade near the locked end and pull in the direction of the arrows to lock the end into place.
6) Reinstall wiper frame to arm, making sure that the lock lever is snapped securely into the arm.
For rear wipers:
1) Hold the wiper arm away from the window.
2) Remove the wiper frame from the arm as shown.
3) Slide the blade out as shown.
NOTE:
Do not flex the wiper blade frame end
more than necessary. If you do, it can
break off.
(1) Retainer
4) If the new blade is provided without the two metal retainers, move them from the old blade to the new one.
5) Install the new blade in the reverse order of removal.
Make sure the blade is properly retained by all the hooks.
6) Reinstall wiper frame to arm in the reverse order of removal.
See also:
Grand Vitara in the Market
American automakers get a lot of criticism for their bad decisions in the
sport utility arena. There was too much emphasis on the truck-based type, and
they're paying the price. Suzuki proves with ...
Safety
An electronic stability system is optional on the sedan and standard on the
Crossover. Standard features include:
Four-wheel-disc antilock brakes Side-impact airbags for front and rear seats
Sid ...
Plain (Petite) Jane
Shop the competition, and the first thing you'll notice about the SX4 is its
diminutive size. A family friend who owns a Honda Fit said my test car looked
tiny. Technically, it isn't: The SX4 has ...