Engine Oil and Filter
Specified Oil
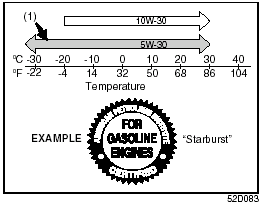
(1) Preferred
Use engine oil with the American Petroleum Institute Certified For Gasoline Engines “Starburst” symbol.
Select the appropriate oil viscosity according to the above chart.
We highly recommend you use SAE 5W- 30 oil.
CAUTION:
Failure to use the recommended oil
can result in engine damage.
Oil Level Check
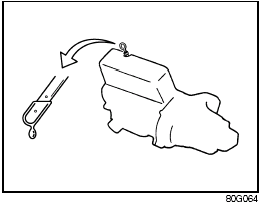
Engine oil dipstick
It is important to keep the engine oil at the correct level for proper lubrication of your vehicle’s engine. Check the oil level with the vehicle on a level surface. The oil level indication may be inaccurate if the vehicle is on a slope. The oil level should be checked either before starting the engine or at least 5 minutes after stopping the engine.
The handle of the engine oil dipstick is colored yellow for easy identification.
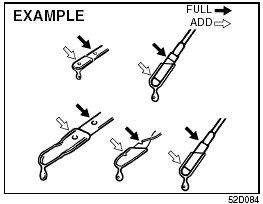
Pull out the oil dipstick, wipe oil off with a clean cloth, insert the dipstick all the way into the engine, then remove it again. The oil on the stick should be between the upper and lower limits shown on the stick.
If the oil level indication is near the lower limit, add enough oil to raise the level to the upper limit.
Refilling
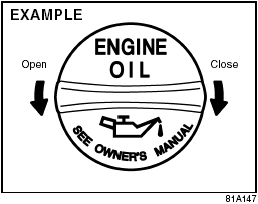
Remove the oil filler cap and pour oil slowly through the filler hole to bring the oil level to the upper limit on the dipstick. Be careful not to overfill. Too much oil is almost as bad as too little oil. After refilling, start the engine and allow it to idle for about a minute. Stop the engine, wait about 5 minutes and check the oil level again.
Changing Engine Oil and Filter
Drain the engine oil while the engine is still warm.
1) Remove the oil filler cap.
2) Place a drain pan under the drain plug.
3) Using a wrench, remove the drain plug and drain out the engine oil.

WARNING:
The engine oil temperature may be
high enough to burn your fingers
when the drain plug is loosened. Wait
until the drain plug is cool enough to
touch with your bare hands.
WARNING:
New and used oil and solvent can be
hazardous. Children and pets may be
harmed by swallowing new or used
oil or solvent. Repeated, prolonged
contact with used engine oil may
cause [skin] cancer. Brief contact
with used oil or solvent may irritate
skin.
• Keep new and used oil and solvent away from children and pets.
• Wear a long-sleeve shirt and waterproof gloves.
• Wash with soap if oil or solvent contacts your skin.
4) Reinstall the drain plug and gasket.
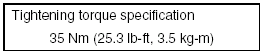
Tighten the plug with a wrench to the specified torque.
Replace the Oil Filter
1) Remove the engine under cover.
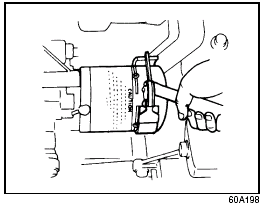
2) Using an oil filter wrench, turn the oil filter counterclockwise and remove it.
3) Using a clean rag, wipe off the mounting surface on the engine where the new filter will be seated.
4) Smear a little engine oil around the rubber gasket of the new oil filter.
5) Screw on the new filter by hand until the filter gasket contacts the mounting surface.
CAUTION:
To tighten the oil filter properly, it is
important to accurately identify the
position at which the filter gasket
first contacts the mounting surface.
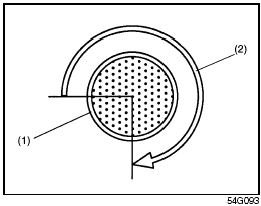
(1) Oil filter
(2) 3/4 turn
6) Tighten the filter 3/4 turn from the point of contact with the mounting surface (or to the specified torque) using an oil filter wrench.

CAUTION:
To prevent oil leakage, make sure
that the oil filter is tight, but do not
overtighten it.
Refill with Oil and Check for Leaks
1) Pour oil through the filler hole and install the filler cap.
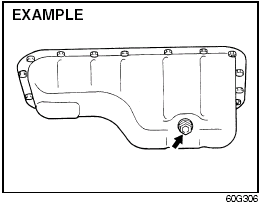
For the approximate capacity of the oil, refer to the “Capacities” item in the “SPECIFICATIONS” section.
2) Start the engine and look carefully for leaks at the oil filter and drain plug. Run the engine at various speeds for at least 5 minutes.
3) Stop the engine and wait about 5 minutes.
Check the oil level again and add oil if necessary. Check for leaks again.
CAUTION:
When replacing the oil filter, it is recommended
that you use a genuine
SUZUKI replacement filter. If you use
an after-market filter, make sure it is
of equivalent quality and carefully follow
the manufacturer’s instructions
and precautions.
CAUTION:
Oil leaks from around the oil filter or
drain plug indicate incorrect installation
or gasket damage. If you find any
leaks or are not sure that the filter
has been properly tightened, have
the vehicle inspected by your SUZUKI
dealer.
See also:
2009 Suzuki Equator review By John Stewart
Suzuki has long manufactured high-performance motorcycles and has been a
player in marine engines, ATVs, dirt bikes and other recreational equipment. It
has sold more than 100,000 vehicles per yea ...
Fuses
Your vehicle has three types of fuses, as
described below:
Main Fuse – The main fuse takes current
directly from the battery.
Primary Fuses – These fuses are between
the main fuse and individ ...
Modification Warning
WARNING:
Do not modify this vehicle. Modification
could adversely affect safety,
handling, performance or durability
and may violate governmental regulations.
In addition, damage or performa ...